Configure Google Workspace
This guide walks through configuring the Google Workspace (Drive) connection inside the Google Client app. This is the minimum required integration, it enables all file management features: upload, preview, sharing, versioning, and folder structure automation.
Note
Haven't installed the package yet? Start here: Install & Upgrade
Before you begin
Before configuring the application, the administrator must grant themselves access to the app.
Step 1: Assign Admin Permissions
- Assign the Google Cloud Client Admin permission set to your user.
- This permission grants access to the Google Client application and configuration features.
Step 2: Open the Google Client Application
After permissions are assigned:
- Open the Google Client application from the App Launcher.
- You will land on the Home page, which displays:
- Current configuration status
- Authentication setup details
- Validation messages for missing or incomplete settings
Step 3: Configure Authentication
Google Client supports two authentication setup options:
- Admin setup (recommended for most orgs), no Apex coding required
- Developer setup (custom authorizer class), for advanced or fully custom scenarios
Both options require that you already uploaded a Salesforce certificate (JKS) as described on the Configure Certificate page, and that you know your Service Account email.
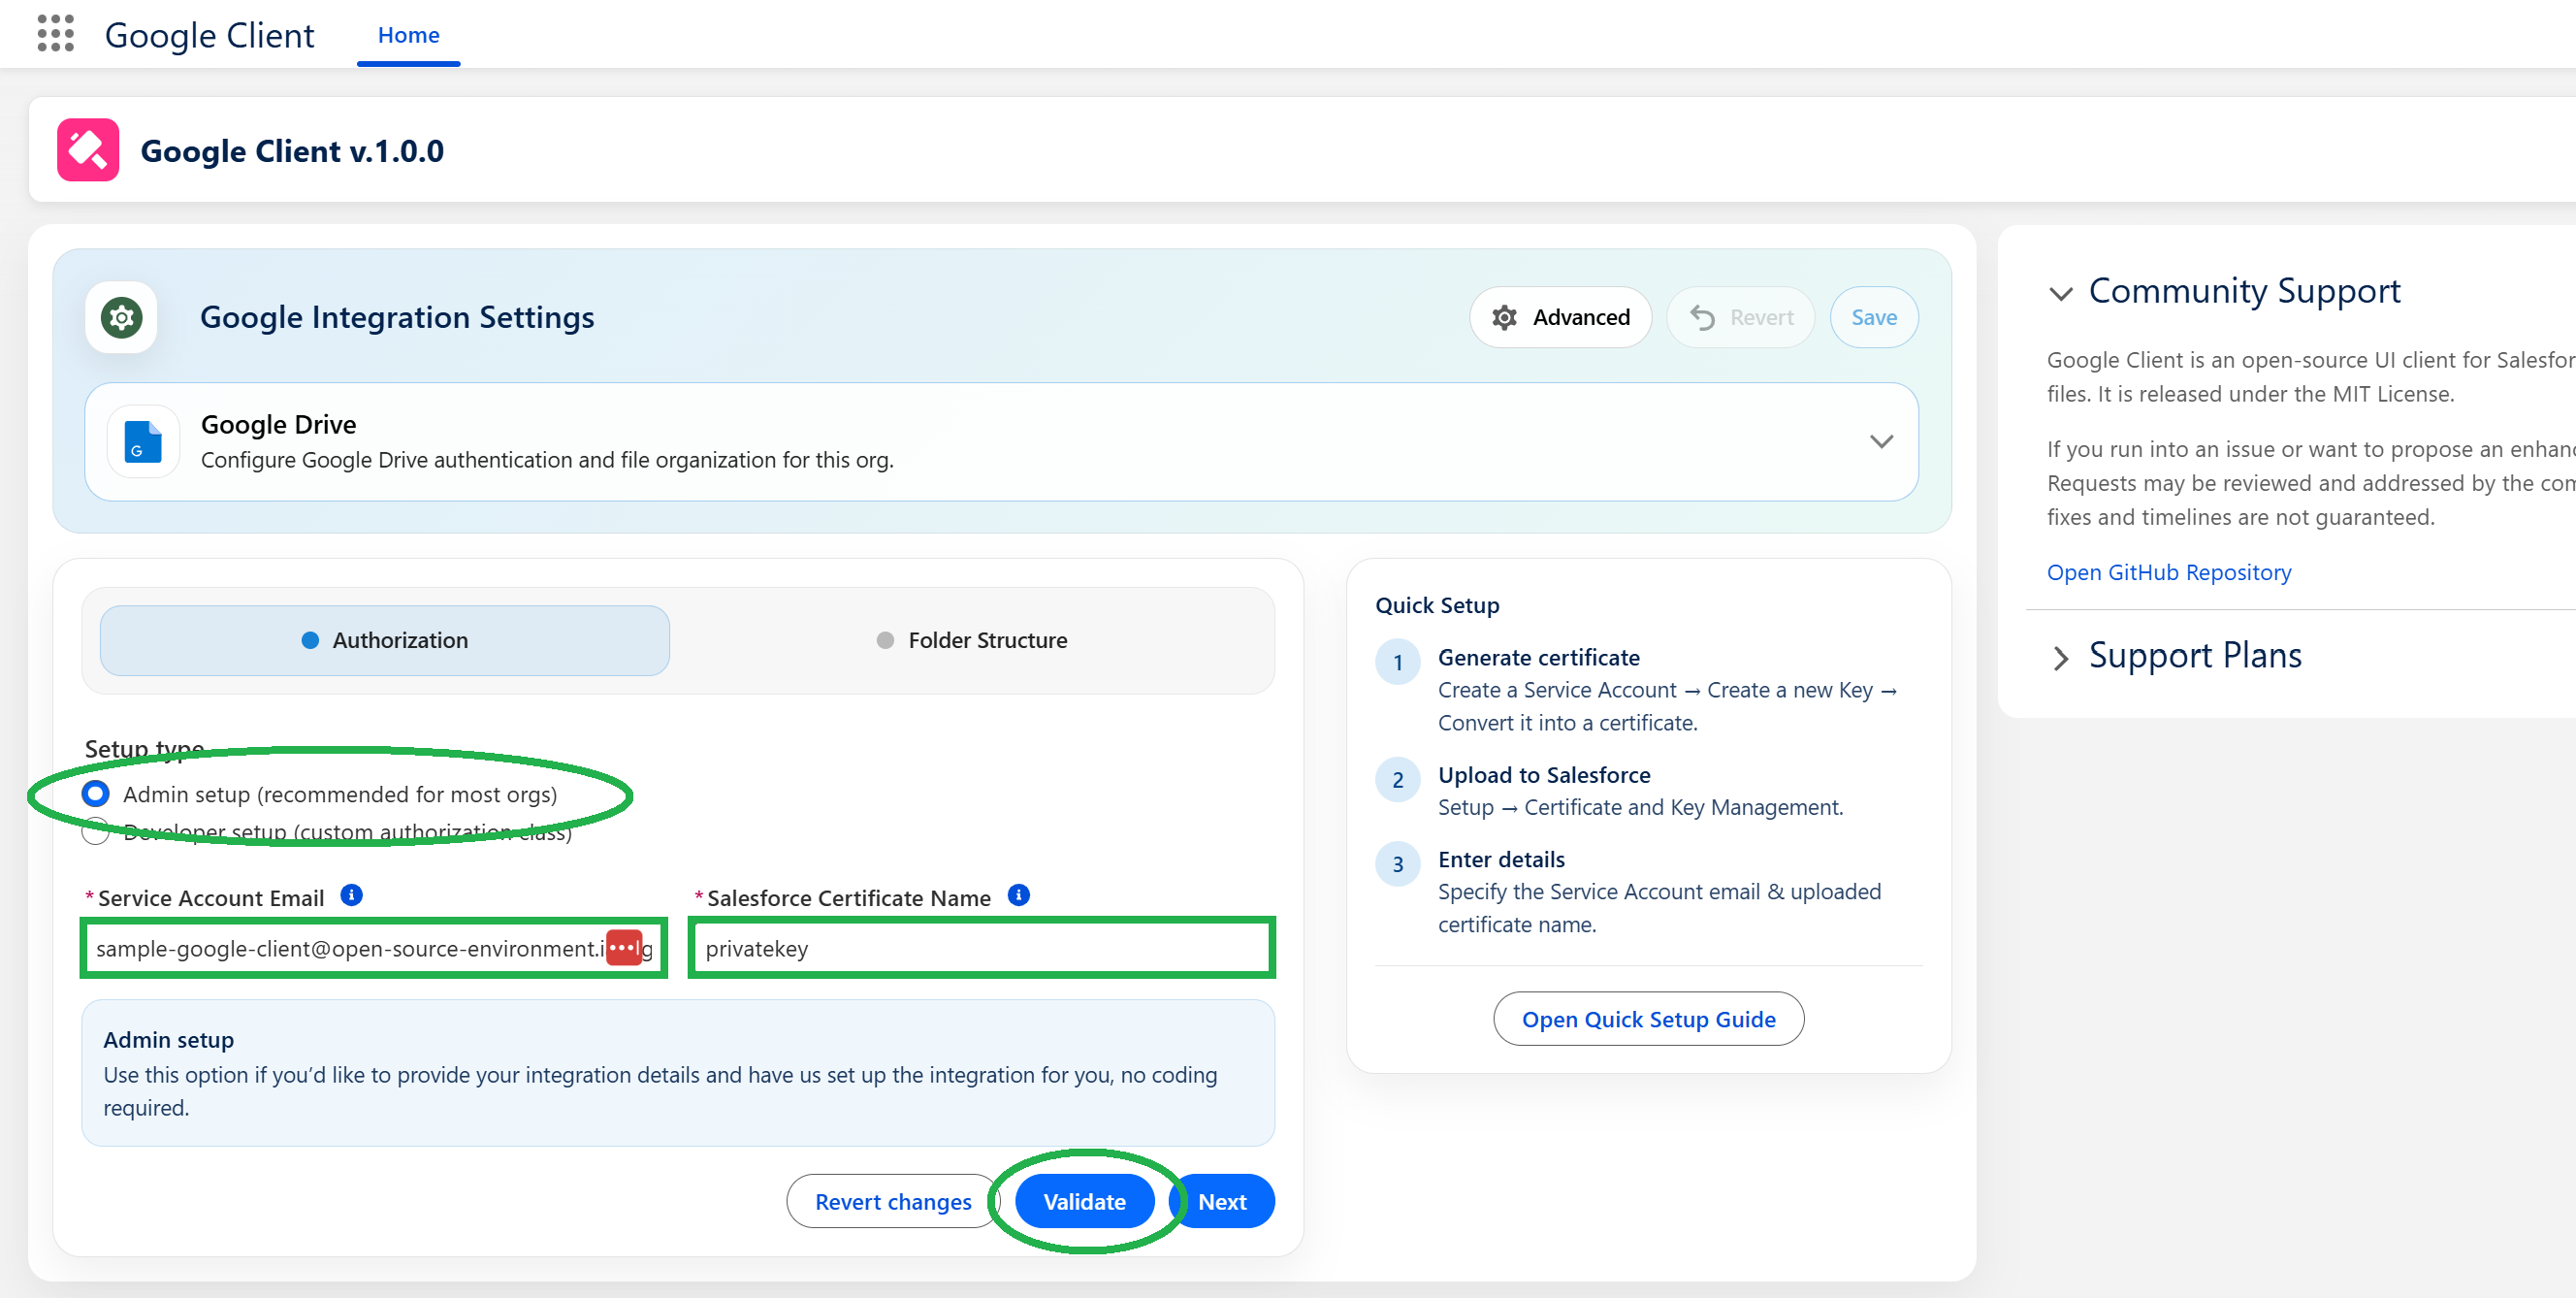
Option A: Admin Setup (No Code)
Use this option if you want to configure authentication through the UI:
- Select Admin setup (recommended for most orgs)
- Enter the Service Account Email
- Enter the Salesforce Certificate Name (the certificate you uploaded earlier)
- Click Save & Validate
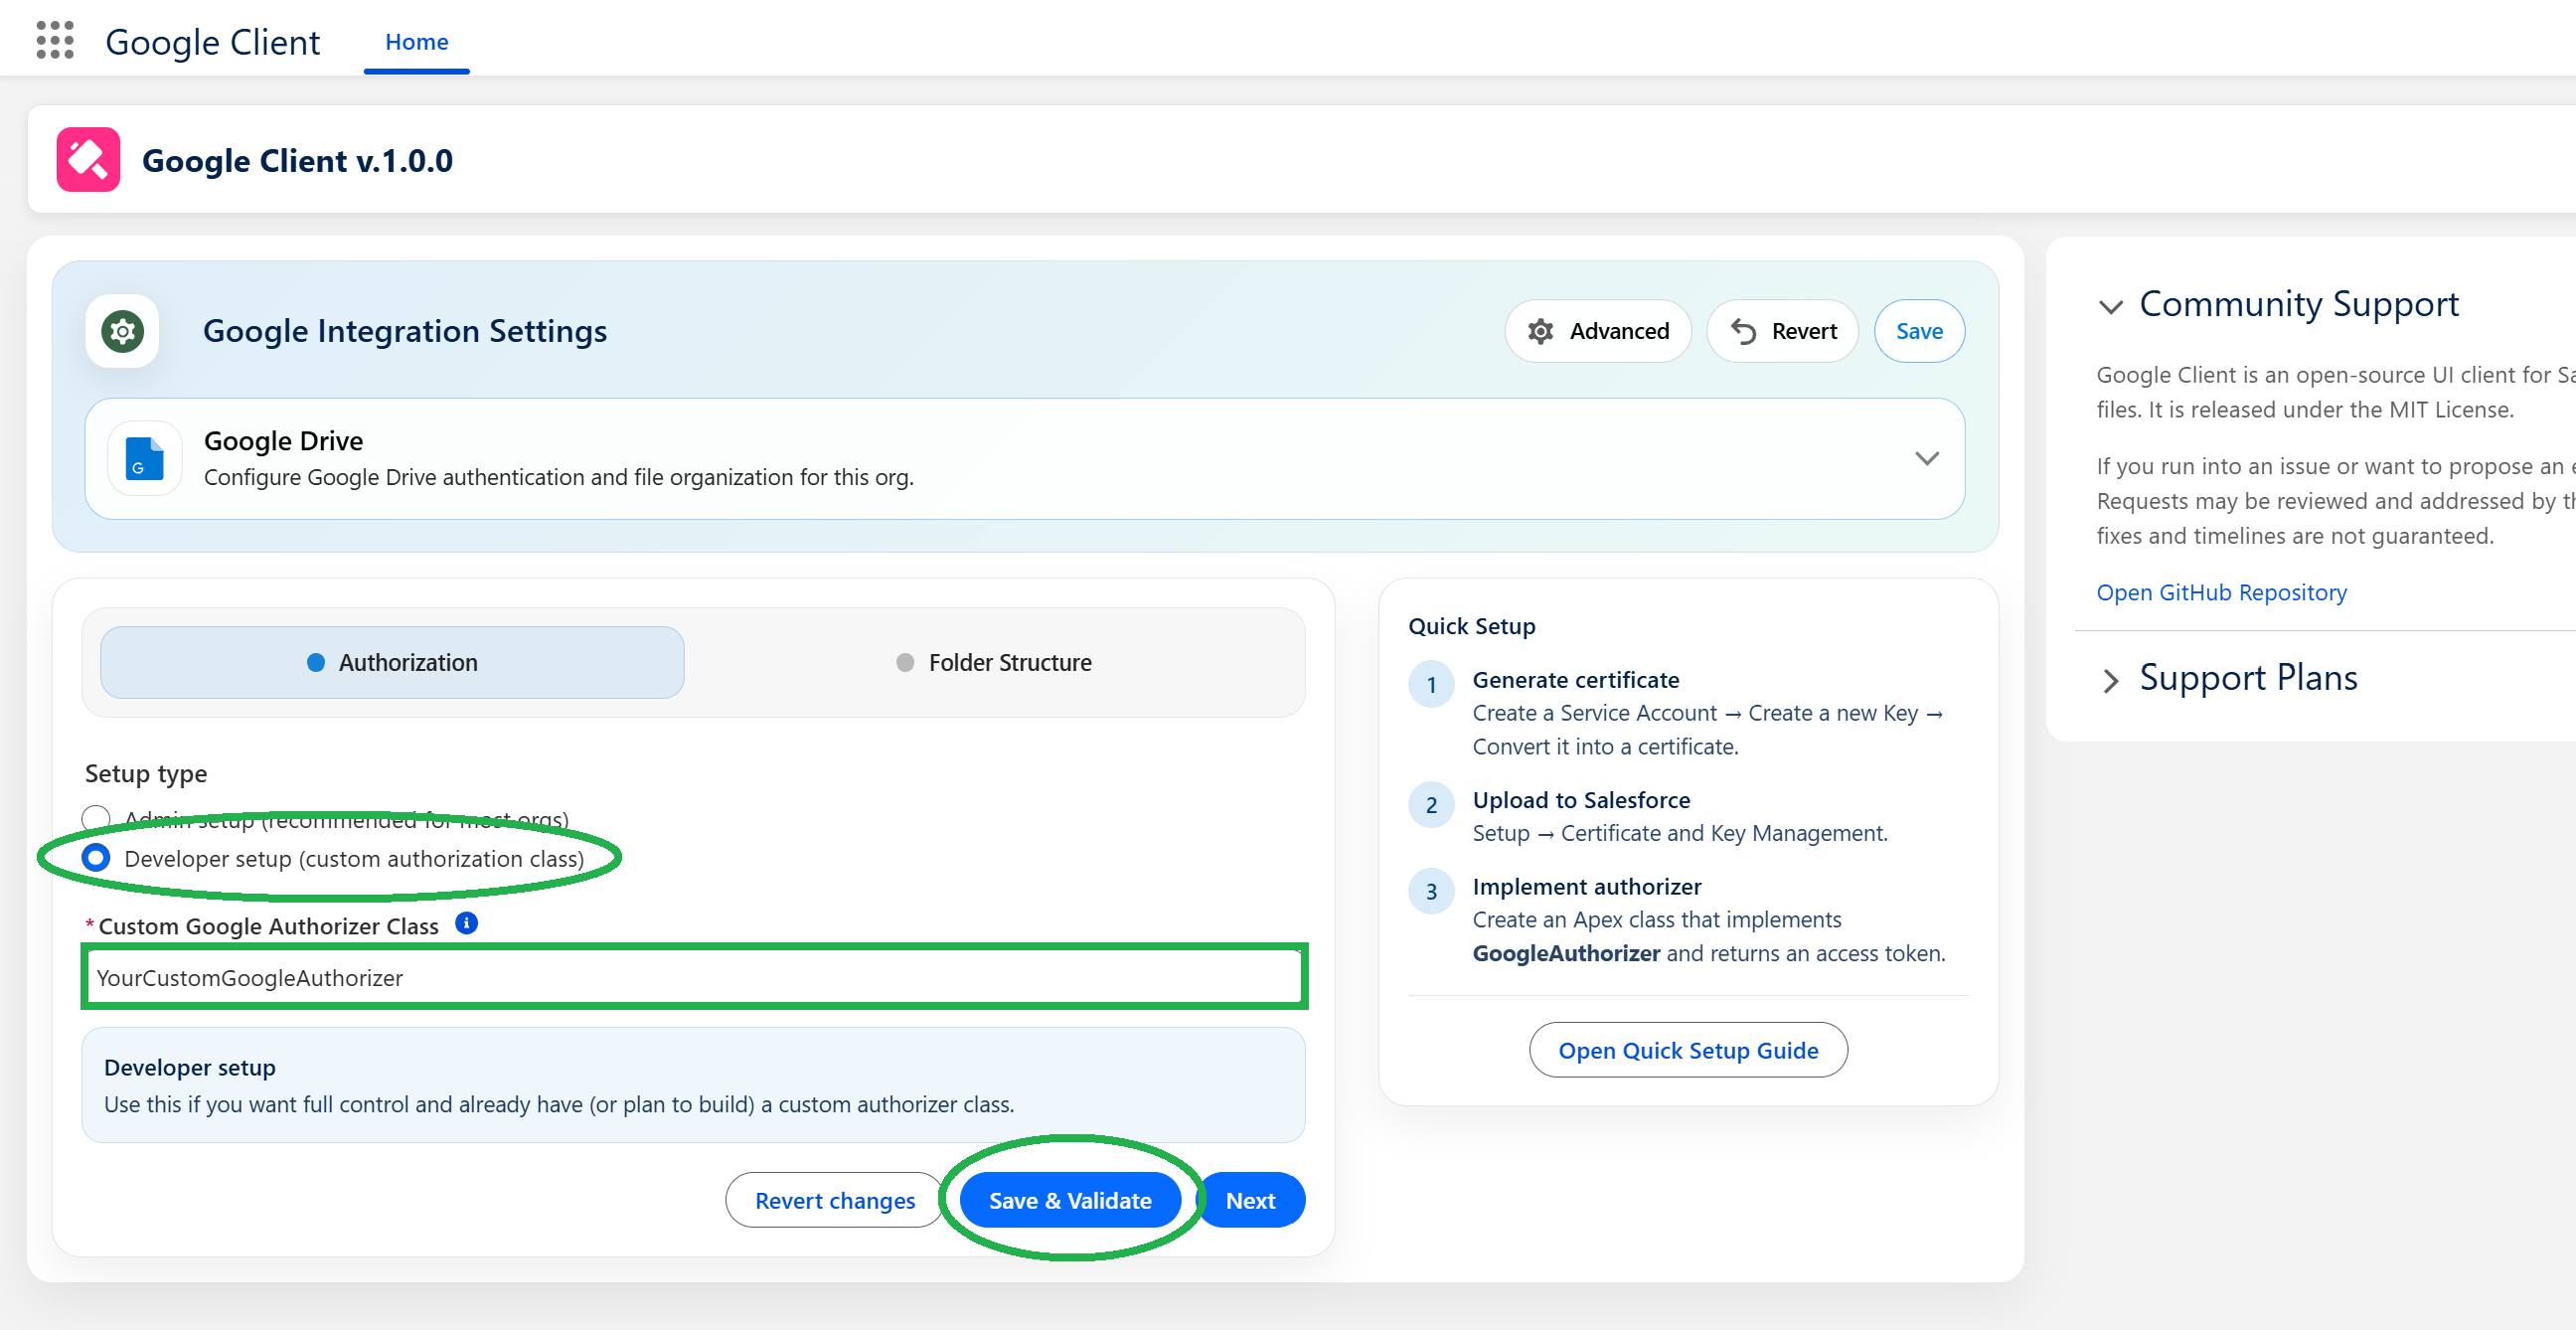
Option B: Developer Setup (Custom Authorizer Class)
Use this option if you need a custom token strategy or want to fully control authorization in Apex:
- Select Developer setup (custom authorization class)
- Create an Apex class that implements the library’s authorization contract
- Reference the class in the Custom Google Authorizer Class field
- Click Save & Validate
📘 Reference documentation: Library Authorization Flow
📘 Certificate setup (use the certificate created earlier): Configure Certificate
Step 4: Complete Application Configuration
After authentication is configured:
- Provide the Google Drive Folder ID.
- Leave all other settings unchanged unless you have specific requirements.
Recommended Folder Strategy
- Use a Shared Drive for centralized, team-managed access.
- Maintain a dedicated root folder per environment (Dev / UAT / Prod).
Note
Google Workspace is now configured. If you'd like to add document summaries and file Q&A, you can also set up the AI & Intelligence layer: Configure AI & Intelligence